Know About MEAN Stack Development
-
 Feb 1, 2018
 - Angular
A stack solution is something that came up especially to resolve issues of the enterprise app development. A collection of open source applications along with the support of the MVC (Model View Controller) architecture together can be termed as MEAN.JS. It is an integrated solution which builds a full-stack JavaScript application. MEAN is an alliance of merits of each of them:
- Mongo DB – No SQL database, JSON style documents and thorough implementation in just ONE Language
- ExpressJS – HTTP server framework with simple interface and also supports simple REST routes, automated HTTP header and Connect middleware
- AngularJS – Frontend JS framework to develop single page applications with modular code, data binding and testing with dependency injection
- NodeJS – Lightweight, scalable and fast web applications can be developed using concurrent JavaScript environment
Lets have a look on the Mean Stack app development.

Creating a Demo app in MEAN Stack Development
Installing Angular
For creating an Angular app, use Angular CLI. Kindly Install it through NPM using the command given below.
npm install @angular/cli -g |
To start with Angular starter go to the project dir. Open a command line and create a new angular project.
cd path/to/dir ng new test_mean cd test_mean |
Now, create a build of this app because Express server is going to use /dist directory to serve the files.
ng build |
Installing Express
Inside the project folder (test_mean in our case) install Express.
npm install express --save |
Body parser module is required that is a middleware for parsing incoming request.npm install body-parser --save |
Now, Node server can be created. Create a server.js file and paste the following code:
const express = require('express'); const bodyParser = require('body-parser'); const path = require('path'); const http = require('http'); const app = express(); // API file for interacting with MongoDB const api = require('./server/routes/api'); // Parsers app.use(bodyParser.json()); app.use(bodyParser.urlencoded({ extended: false})); // Angular DIST output folder app.use(express.static(path.join(__dirname, 'dist'))); // API location app.use('/api', api); // Send all other requests to the Angular app app.get('*', (req, res) => { res.sendFile(path.join(__dirname, 'dist/index.html')); }); //Set Port const port = process.env.PORT || '3000'; app.set('port', port); const server = http.createServer(app); server.listen(port, () => console.log(`Running on localhost:${port}`)); |
Setting up MongoDB
Visit MongoDB and choose an appropriate package based on operating system. Visit MongoDB Installation for getting it run on the system.
For instance, on Windows machine, start MongoDB at the command line.
cd C:\Program Files\MongoDB\Server\3.4\bin mongod |
If everything works successfully then mongo service will start.
While starting service it checks for C:\data\db directory for windows user. Windows user may need data/db directory created in C drive.
Then, open another command prompt and connect to it through the shell by running:
cd C:\Program Files\MongoDB\Server\3.4\bin mongo |
This will allow to perform various operations on a database. Create a very simple database using the following command:
use test_mean db.users.insert({"name":"First demo MEAN","text":"Testing first MEAN Demo"}) |
Use below command to check whether the database has been created or not.
show dbs |
and it will list Dbs created so far.
Now, MongoDB package is required that allows to connect with MongoDB.
npm install mongodb --save |
An Angular structure is ready for the app.
Now, create files that will run on Node. For that create a separate directory.
For example,
server
/routes
Create a file called api.js and put the following code:
const express = require('express'); const router = express.Router(); const MongoClient = require('mongodb').MongoClient; const ObjectID = require('mongodb').ObjectID; // Connect const connection = (closure) => { return MongoClient.connect('mongodb://localhost:27017/test_mean', (err, db) => { if (err) return console.log(err); //MongoDB Version = 3 That database variable is actually the parent object of the object you //are trying to access. // If u using mongo 3+: closure(db.db('test_mean')); }); }; // Error handling const sendError = (err, res) => { response.status = 501; response.message = typeof err == 'object' ? err.message : err; res.status(501).json(response); }; // Response handling let response = { status: 200, data: [], message: null }; // Get users router.get('/users', (req, res) => { connection((db) => { db.collection('users').find() .toArray() .then((users) => { response.data = users; console.log("Users = ",users); res.json(response); }) .catch((err) => { sendError(err, res); }); }); }); router.post("/adduser", (req, res) => { connection((db) => { console.log("db = ", db); var userObj = req.body.user; db.collection("users").insertOne(userObj, function (err, data) { if (err) throw err; else { response.data = data.ops[0]; res.json(response); console.log("Document inserted", response); } }); }); }); module.exports = router; |
Now run following command in a project directory.
node server.js |

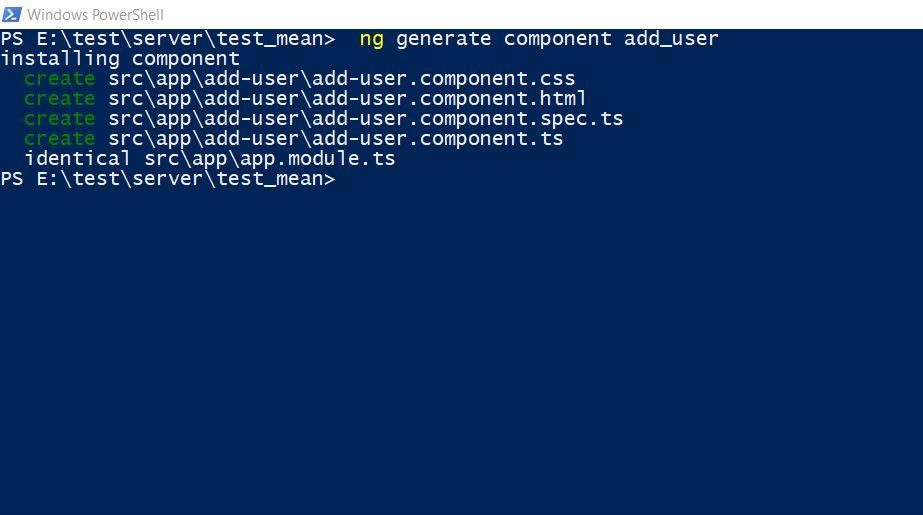
To create a component and add records to MongoDB using Node, follow the steps. Again in project folder run following command from command line.
ng generate component add_user |
This will create files as below:
src/app/add-user
-add-user.component.css
-add-user.component.html
-add-user.component.spec.ts
-add-user.component.ts
Routing in Angular:
To render different views for each endpoint, set route in Angular. Add AppRoutingModule to the App. Check Routing for more details.
Use below command to generate it:
ng generate module app-routing --flat –module=app |
This will generate a new file app-routing.module.ts in app/src folder.
Import Routes and RouterModule from @angular/router library. Core intention is to render add-user.component for URL like http://localhost:3000/createuser.
Import the add-user.component and reference it in a route.
Use RouterModule.forRoot() to configure routes and import it in @NgModule. Now, app-routing.module.ts look like this:
import { NgModule } from '@angular/core'; import { RouterModule, Routes } from '@angular/router'; import { AddUserComponent } from './add-user/add-user.component'; const routes: Routes = [ { path: 'createuser', component: AddUserComponent } ]; @NgModule({ exports: [ RouterModule ], imports: [RouterModule.forRoot(routes)], }) export class AppRoutingModule { } |
Add RouterOutlet
In src/app/app.component.html replace HTML to <router-outlet>. It decides where to display routed view. This file will now contain <router-outlet></router-outlet>
Let’s set some view in src/app/add-user/add-user.component.html.
Add following code to add-user.component.html file.
<div class="wrapper"> <!-- Start Content --> <div class="content-wrap bg-block"> <div class="page-form-outer"> <div class="container"> <div class="page-form-block"> <div class="row"> <div class="col-sm-6 info-block"> <h3>User Information</h3> <form> <div class="form-group"> <label>First Name:</label> <input type="text" [(ngmodel)]="user.first_name" name="first_name" class="form-control" placeholder="First Name"> </div> <div class="form-group"> <label>Last Name:</label> <input type="text" [(ngmodel)]="user.last_name" name="last_name" class="form-control" placeholder="Last Name"> </div> <div class="form-group"> <div class="row"> <div class="col-md-4 col-sm-6 inner-blk"> <label>City:</label> <input type="text" [(ngmodel)]="user.city" name="city" class="form-control" placeholder="City"> </div> <div class="col-md-4 col-sm-6"> <label>Zip Code:</label> <input type="text" [(ngmodel)]="user.zip" name="zip" class="form-control" placeholder="Zip Code"> </div> </div> </div> <div class="form-group"> <label>Phone Number:</label> <input type="text" [(ngmodel)]="user.phone_number" name="phone_number" class="form-control" placeholder="Phone Number"> </div> <button type="button" class="btn btn-secondary" (click)="addUser()" title="Add">Add</button> </form> </div> </div> </div> </div> </div> <!-- End Content --> </div> </div> |
For this sample app, use bootstrap CSS to style elements.
Considering the best practices, put third-party CSS in src/assets/CSS directory and include css in index.html.
<link rel="stylesheet" href="./assets/css/bootstrap.min.css"> |
Add some common styles in app.component.css
html, body{min-height: 100%;} body{font:14px/18px;font-family: 'Open Sans', sans-serif;font-weight:400;} /* .wrapper{min-height: 100%;} */ a{color: #2c3e50; text-decoration: none;} a:hover,a:focus{text-decoration: none; color: #0054A5} a:focus,button:focus{outline:0 !important;} .hr-line{border:0; border-top: solid 1px #999;} h1, h2, h3, h4, h5, h6{line-height: 1.2em; padding: 0 0 20px;color:#082e39;} h1 span, h2 span, h3 span, h4 span, h5 span, h6 span{display: block; font-size: 0.5em; line-height: 1.2em;} h1{font-size: 2.8em;} h2{font-size: 2.5em;} h3{font-size: 2.1em;} h4{font-size: 1.7em;} h5{font-size: 1.4em;} h6{font-size: 1.07em;} p{padding: 0 0 20px;color: #0a2739;} p a{color: #ccd0d3;outline:none;} p a:hover,p a:focus{color: #0054A5;outline:none;} p b{font-weight: bold;} p i{font-style: italic;} p u{text-decoration: underline;} p span{display: block;} ul{margin-bottom: 0;} input[type=text],input[type=email],input[type=password],textarea{-webkit-appearance:none;} |
When this code is run on http://localhost:3000/createuser, below view is available:

Add addUser() method to src/app/add-user/add-user.component.ts
import { Component, OnInit } from '@angular/core'; import{Http,Headers, RequestOptions} from '@angular/http'; import { Observable } from 'rxjs'; import 'rxjs/add/operator/map'; import {DataService} from '../services/data.service'; @Component({ selector: 'app-add-user', templateUrl: './add-user.component.html', styleUrls: ['./add-user.component.css'] }) export class AddUserComponent implements OnInit { user:any = {}; constructor( public http: Http, public service: DataService) { } addUser(){ console.log("Model user",this.user); this.service.addUser(this.user).subscribe(data=>{ console.log("Returned user",data); }, error => { console.log("Error",error) }) } ngOnInit() { } } |
To add records to database, create a service.
ng generate services/data |
This will generate new service files in src/spp/services directory.
Use below code for data.service.ts:
import { Injectable } from '@angular/core'; import { Http, Headers, RequestOptions } from '@angular/http'; import 'rxjs/add/operator/map'; import { Observable } from 'rxjs'; import { AddUserComponent} from '../add-user/add-user.component'; @Injectable() export class DataService { result:any; url:string; constructor(private _http: Http) { this.url="http://localhost:3000/api/addUser"; } getUsers() { return this._http.get("/api/users") .map(result => this.result = result.json().data); } addUser(user){ console.log("User ",user); let options = null; return this._http.post(this.url, {"user":user}, options).map(result => this.result = result.json().data) .catch(this.handleErrorObservable); } private handleErrorObservable (error: Response | any) { console.error(error.message || error); return Observable.throw(error.message || error); } } |
app.module.ts file should look like following:
Make sure to import DataService and pass it to providers.
import { BrowserModule } from '@angular/platform-browser'; import { NgModule } from '@angular/core'; import{HttpModule,Headers} from '@angular/http'; import { AppComponent } from './app.component'; import { AddUserComponent } from './add-user/add-user.component'; import { AppRoutingModule } from './app-routing.module'; import { FormsModule } from '@angular/forms'; import {DataService} from './services/data.service'; @NgModule({ declarations: [ AppComponent, AddUserComponent ], imports: [ FormsModule, BrowserModule, AppRoutingModule, HttpModule, ], providers: [DataService], bootstrap: [AppComponent] }) export class AppModule { } |
Now, again generate updated build using ng build command, so app running on Node will reflect the updated view.
Run app on http://localhost:3000/createuser and then create new users.
Hereby, it is clear how to make an app in MEAN stack. All the perks mentioned of MEAN, foster the business by helping them in quickening workflow by meeting customer satisfaction.
In the real world, with any e-commerce system multilevel filtering is a core feature demanded by any of the business. Generally, with product’s attributes we...


Comments
Leave a message...