Introducing Gatsby for Building Websites Using WordPress and ReactJS
Websites are like virtual gateways to your business profitability. Businesses are extremely cautious while deciding to develop one that has the potential to accelerate opportunity. There are numerous platforms and website building frameworks that contribute together to create an interactive, scalable, and high-performing application. Gatsby is one such popular framework built on ReactJs which provides great features to build a Single Page JavaScript Application by getting data from any CMS.
Scope of WordPress with ReactJS
ReactJS front end development is feasible which would consume the data generated in WordPress using a Gatsby framework. Gatsby facilitates developing an application with front-end in ReactJs utilizing the data and the content generated and maintained in WordPress which acts like a backend. The Gatsby ReactJs frontend app would communicate with the WordPress backend through WordPress REST APIs which would act as a medium to create and fetch the data to and fro in the front-end application.
Why Choose Gatsby?
It is believed that to develop front-end applications using Gatsby in ReactJs would be a great option as Gatsby’s rich data plugin ecosystem allows us to build sites with the data from one to many sources. In our case, the data in the front-end application would be fed from the WordPress REST APIs. As Gatsby facilitates retrieving the data directly into our pages using GraphQL, this app would be blazing fast.
What Makes Developers Reluctant about Using Gatsby?
Based on the current trends and proficiency of working with Gatsby, it has been found that Gatsby has the following limitations:
Gatsby builds a static site starting with fetching the content from WordPress that existed that very moment the app was built. Once the Gatsby app is built and after this, if the WordPress content gets updated, the updated data will not be reflected in the Gatsby app. To reflect the updated WordPress content in the Gatsby app, it needs to be rebuilt.
Setup Gatsby
We will learn how to set up an environment to begin development with Gatsby and create a basic site using Gatsby.
First, let’s start with the Prerequisites
Before we begin with the development environment, we need to check for its prerequisites. We need to install npm, a node package manager, through which we can install Gatsby and other packages. We also need to install Git, a source code versioning tool. You can visit the NodeJS and GIt websites from where you can find an appropriate installer for NodeJS.
Install Gatsby
For installing Gatsby, you need to first make sure that you have NodeJS and Git in place and so the next step is to install Gatsby.
You can install it through the below command
npm install -g gatsby-cli |
It will install a global package for Gatsby so you can now use Gatsby’s commands in further development.
Build and Deploy Your Gatsby Site
You can now run the below command to create your first Gatsby site
gatsby new react-gatsby-WordPress |
It will create the project directory react-gatsby-WordPress in your current path. It will clone the default boilerplate provided by Gatsby. You can now run the below commands to go into the directory and run the development version of the site
cd gatsby-WordPress / / Project directory |
gatsby develop // To run development environment |
Run this URL in browser to visit your development site http://localhost:8000
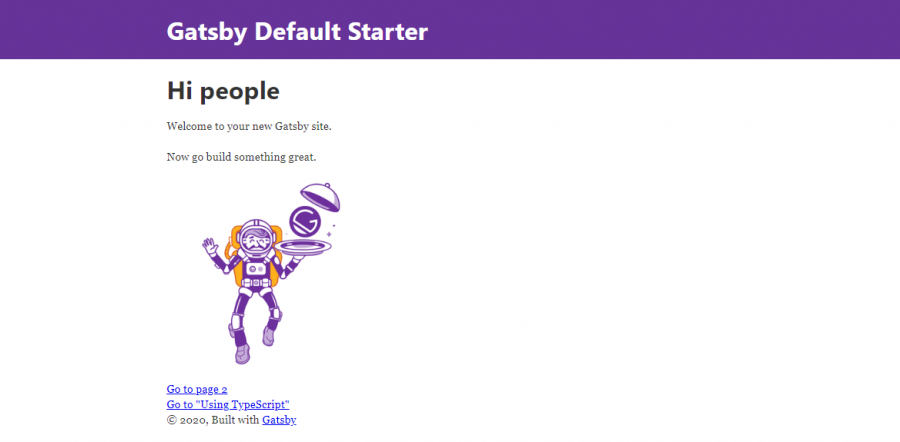
You can run the following command to build the static site. All the static files will be exported in the public directory. You can upload all the content of the public directory to your server to make it live.
gatsby build |
If you want to run your build locally, you need to run below command after performing build command
gatsby serve |
That’s it, now you are done with the basic static site using Gatsby. Now, we will learn how to integrate with WordPress.
Connect with WP
To begin with the integration of Gatsby in WordPress, we need to install the required Gatsby plugin gatsby-source-WordPress. Then, we need to configure this plugin to point to WordPress. When you want to run it on a development server, this will take down the latest data from WordPress.
Run below command to install plugin –
npm install gatsby-source-WordPress |
Configure Gatsby
Now, adding the installed plugin will be simpler using Gatsby’s configuration file, gatsby-config.js, and by adding the following code, you will be connected to Gatsby plugin in your WordPress CMS.
Note – assuming that you know how to set up WordPress.
module.exports = { siteMetadata: { ... }, plugins: [ ... { resolve: `gatsby-source-WordPress`, options: { // URL of your WordPress site baseUrl: `localhost/WordPress`, protocol: `http`, // Make it true if your WordPress site is hosted on WordPress.com hostingWPCOM: false, // Mention which type of data to be fetched includedRoutes: [ '**/posts', ] } } ], } |
Fetch Posts with GraphQL
GraphQL is an open source query language which is used in Gatsby to fetch WordPress posts in bulk.
You can access the GraphQL editor by opening the URL below in the browser to see and select which content you want to fetch from WordPress. Run the development server and open below URL in browser – http://localhost:8000/___graphql
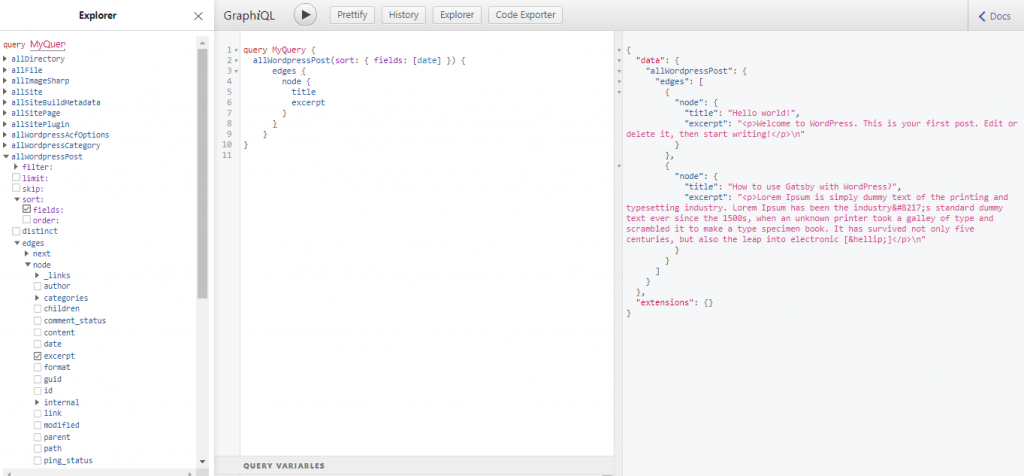
If you want to pull out content, you will have to add the GraphQL queries in the index.js file.
Please find below code which can be used to pull the Title and Excerpt from each post.
import React from "react" import { graphql } from "gatsby" import Layout from "../components/layout" import SEO from "../components/seo" export default ({ data }) => { return ( <Layout> <SEO title="home" /> <h4>WordPress Posts</h4> {data.allWordPressPost.edges.map(({ node }) => ( <div> <h5>{node.title}</h5> <div dangerouslySetInnerHTML={{ __html: node.excerpt }} /> </div> ))} </Layout> ) } export const pageQuery = graphql` query { allWordPressPost(sort: { fields: [date] }) { edges { node { title excerpt } } } } |
After this, if you visit the development site, you will be able to pull the list of posts containing WordPress titles and excerpts.
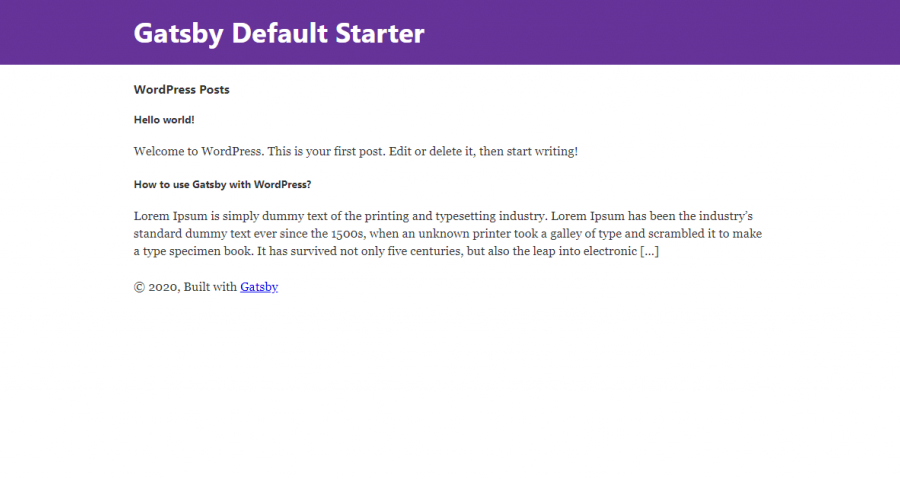
Similarly, you can play more around this to add filters to the post listing and create a separate page to display the details of each post.
Create Post Details Page
Let’s see how we can create dynamic pages for each post with Gatsby. We have seen how we can pull the list of posts, now we need to create a dynamic page for each post. Gatsby provides an action createPage for this.
Open gatsby-node.js and add the following code in it. Users can easily define the needs they want to display.
const path = require(`path`) exports.createPages = ({ graphql, actions }) => { const { createPage } = actions return graphql(` { allWordPressPost(sort: {fields: [date]}) { edges { node { title excerpt slug date(formatString: "MM-DD-YYYY") } } } } `).then(result => { result.data.allWordPressPost.edges.forEach(({ node }) => { createPage({ // Crate URL of the post using slug path: node.slug, // path to common template of post component: path.resolve(`./src/templates/wp-post.js`), context: { // Specify the $slug variable, passing to wp-post.js slug: node.slug, }, }) }) }) } |
The above code will create a dynamic page for each post using the slug. Later, we will see the common template that needs to be created to display the post details.
Create Template to Display Post Detail
Now, users can develop a new directory with named templates in the src directory to create a new file using wp-post.js within the templates directory and by entering the following code:
import React from "react" import Layout from "../components/layout" import { graphql } from "gatsby" export default ({ data }) => { const post = data.allWordPressPost.edges[0].node console.log(post) return ( <Layout> <div> <h1>{post.title}</h1> <div dangerouslySetInnerHTML={{ __html: post.content }} /> <p> On: {post.date} </p> <p> Last modified: {post.modified} </p> </div> </Layout> ) } export const query = graphql` query($slug: String!) { allWordPressPost(filter: { slug: { eq: $slug } }) { edges { node { title content slug date(formatString: "MM-DD-YYYY") modified(formatString: "MM-DD-YYYY") } } } } ` |
We can specify where we want to display the additional fields like Created Date, Modified Date. To explore more fields, users can add and use the GraphQL editor.
Add Link to Post Detail Page
We have created a list of all posts as well as the template to display post details, but to link those pages so one can redirect to the detail page? Let’s update index.js file to add link to each post –
import React from "react" import { Link, graphql } from "gatsby" import Layout from "../components/layout" import SEO from "../components/seo" export default ({ data }) => { return ( <Layout> <SEO title="home" /> <h4>WordPress Posts</h4> {data.allWordPressPost.edges.map(({ node }) => ( <div> <Link to={node.slug}> <h5>{node.title}</h5> </Link> <div dangerouslySetInnerHTML={{ __html: node.excerpt }} /> </div> ))} </Layout> ) } export const pageQuery = graphql` query { allWordPressPost(sort: { fields: [date] }) { edges { node { title excerpt slug } } } } |
This is how the index page looks like –
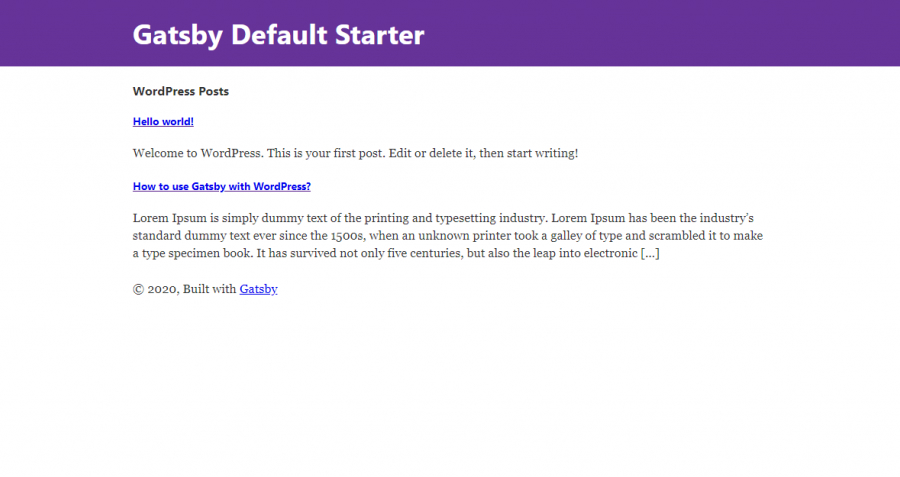
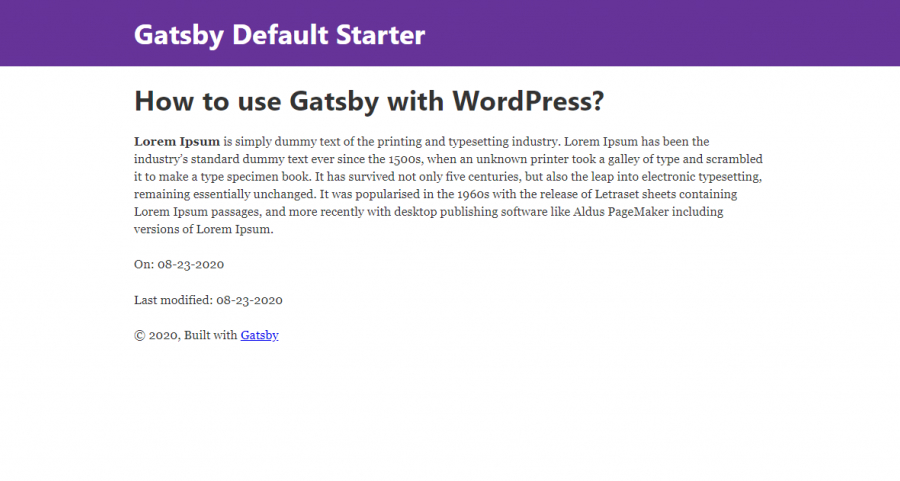
Now, you can click on the link to redirect to the post detail screen. This is the screenshot of how the post details screen will look like –
Conclusion
There are a lot of things we can do further to render different content from the WordPress site. Gatsby has offered wide-ranging facilities for businesses to build interactive and high-performing websites. The impeccable features of Gatsby-react with GraphicalQL and static site generating facilities has helped businesses increase load time, code splitting, server-side rendering, intelligent image loading, asset optimization, and data prefetching.
More related Blog Post
Developing Custom Image Repeater in WordPress
Lazy Collection is a class that supplies generators for the items of array. If you are experienced with Laravel 5.x version then you can find...
 Oct 15, 2020

Comments
Leave a message...