How to Make a Simple Chat Application using PHP Websocket
-
 Dec 4, 2018
 - PHP
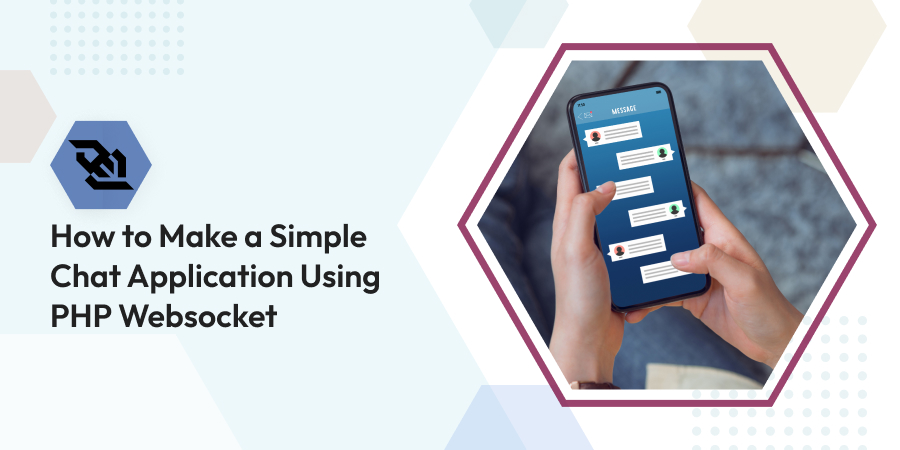
Table of Content
1. What is PHP Websocket?
There is a need for a persistent connection between the server and the clients and PHP Websocket is such a low latency or fast connection. Unlike those AJAX requests where the communication flows just in one way whereas in WebSockets it is bi-directional which means that the client and server both can listen to each other in real-time. They are also capable of responding to any changes.
WebSocket is a correspondence convention for a constant, bi-directional, full-duplex TCP association from a client’s internet browser to a server.
The WebSocket convention empowers association between a customer, (for example, a program) and a web server with lower overheads, encouraging continuous information exchange from and to the servers.
WebSockets can be exceptionally advantageous for building real-time correspondence or information spilling applications on the web, for example, talk applications and applications that stream pictures or different kinds of media.
2. WebSockets and PHP: What You Need to Consider
In the case of PHP WebSockets, most of the discussions are focused on client-side challenges like developing a reliable WebSocket-based solution for PHP applications. It is also assumed more often than you might have already figured out what solution you want to use on your server-side.
But if you are still undecided then have no worries, any open-source loosely coupled php library or a cloud-based solution will do just fine. It is also important to mention here that the knowledge I’m sharing over here is extensively collected from the experts that were specialized in facing the challenges of real-time communication using WebSockets.
So, without any further ado, we will jump right into the key aspects like the workflow of WebSockets, how to authenticate it, managing the reconnections with continuity, starting a chat server, and more. But make sure that if you want to build a reliable system then your client-side WebSocket implementation must be resourceful to manage all the complexities that come down to its path.
3. Why WebSocket Server instead of the HTTP(S) Request Method?
With WebSockets, you can build up a persistent websocket connection, which takes into account bidirectional correspondence between client and server. These days, you will generally discover REST constructed APIs in light of the web, which is based upon HTTP request. These APIs are devoured as follows: The customer asks for a page or asset and the server reacts (ask for a response).
WebSockets has the following advantages over HTTP:
1. Real-Time Communication
WebSockets are bi-directional, which means the server can send information to a program without requesting it. This implies applications that require the continuous trade of data should be possible over a standard web convention. Since WebSockets needn’t bother with the HTTP request when making an association, there is a noteworthy decrease of pointless HTTP header activity.
With a WebSocket, you never again need to sit tight for demand before it sends new information; it will naturally send the information to the customer the minute there is new data.
2. Less Overhead
HTTP is a stateless protocol, thus the overhead of the HTTP header is added to every single message, which can get quite large.
Moreover, the HTTP connection will usually only stay alive for a certain amount of requests and will be closed after some time of being idle.
Thus connections will quite frequently have to be reestablished, which introduces an initial setup time due to the TCP 3-Way Handshake (and exchanging certificate and key pairs in case of HTTPS).
3. Stream Processing
Using WebSockets, binary data of arbitrary size can stream essentially between client and server.
Let’s see PHP Chat application implementation using Web Socket.
4. Working Flow of Websocket

1. Connecting to the Web Server
The working of the client and server PHP WebSockets is very similar. Because if it is deemed necessary, they both respond to the events and perform actions. Irrespective of any specific language a PHP developer uses, a WebSocket server is programmed to perform some specific actions. It is all put at the appropriate condition to a WebSocket address to start and manage operations like public function OnOpen(), public function OnClose(), public function OnError(), and OnMessage() events, and public function send messages to the chat clients.
2. Creating a Web Socket Server Instance
There is a WebSocket protocol, due to which every PHP WebSocket would need a valid host and a port. For example, you want to create a WebSocket server instance,
var server = new WebSocketServer("ws://localhost:8181"); |
If an URL is not used before then it can be used with a specification of a port to make it a valid URL. It is also highly recommended that you keep the records of your connected clients. It can offer various kinds of data or send messages to everyone.
The IwebSocketConnection interface is used by PHP developers to display the incoming connections or clients. therefore every time someone connects or disconnects from the service, an empty list is created or it is updated.
var clients = new List<IWebSocketConnection>(); |
After that, you have to call on the Start method and wait until your clients get connected to the service. Now, you can start your server so that it can immediately start accepting incoming connections. Although one must set a parameter that shows the socket that raised the events –
server.Start(socket) => { }); |
3. OnOpen Event
OnOpen is an event that represents that a new connection has requested access to the service and has performed an initial handshake. One needs to add the new client to the list and store all the relevant information to it like an IP address. You can easily get such information along with a unique identifier for each new client or connection id.
server.Start(socket) ⇒ { socket.OnOpen = () ⇒ { // Add the incoming connection to our list. clients.Add(socket); } // Handle the other events here... }); |
4. OnClose Event
If somehow a client gets disconnected from the server or service, the OnClose event is raised in such a situation. Then the client is removed from the list and the rest of the connections are informed about the incident as well.
socket.OnClose = () ⇒ { // Remove the disconnected client from the list. clients.Remove(socket); }; |
5. OnMessage Event
Whenever a client wants to send some data to the server, the OnMessage event is raised. Under this event management, all the incoming messages are directly transmitted to the client. If the connections choose to, they can allow the server to display some selected messages only. The process to imply this is very simple. Here, the handler takes a string named messenger as a parameter –
socket.OnMessage = () ⇒ { // Display the message on the console. Console.WriteLine(message); }; |
6. Send () Method
The connection can use the Send()method to transmit any message directly to a specific client or connection. Using this event, text or binary data can also be stored across the clients. It has a working of an OnMessage event –
socket.OnMessage = () ⇒ { foreach (var client in clients) { // Send the message to everyone! // Also, send the client connection's unique identifier in order // to recognize who is who. client.Send(client.ConnectionInfo.Id + " says: " + message); } }; |
5. WebSocket Implementation at Client Side
At the client-side, we will have to write some HTML code to create a chat interface and jQuery code which contains methods and events of the WebSocket.

- Create a file – index.php
- Add below PHP code that will pick up a random color for the Username to display in the Chat window.

- Add HTML for the Chat interface which will display the Chat panel and Fields to enter User name and Message.

- The below code will be used to open the web socket connection. As WebSocket uses a different protocol for connection, we are using ws:// in place of http://.var wsUri = “ws://localhost:9000/socketchat/server.php”;
websocket = new WebSocket(wsUri); |
After opening the socket connection, we have to write some event handlers that will return the status of socket connection, errors, and incoming messages.
- /create a new WebSocket object.
- websocket.onopen = function(evt) { /* do stuff */ }; //call when socket connection initiates
- websocket.onclose = function(evt) { /* do stuff */ }; //call when socket connection closed
- websocket.onmessage = function(evt) { /* do stuff */ }; //call when client receives data from server
- websocket.onerror = function(evt) { /* do stuff */ }; //call when any error
- websocket.send(message); //call when client sends data to server
- websocket.close(); //call to close socket connection

- We will write methods to send the message to WebSocket by clicking the Send button from the chatbox.
send_message() method will be called when the user clicks on the Send button or Press Enter in the Chat message text box. This method will convert chat messages, username, and color data into JSON format and send it to the WebSocket server
So now the Chat page is ready which will connect to the server. We also need to implement a WebSocket Server in PHP that will run permanently and send and receive data from the Chat Page.
This server will run in the background to keep the WebSocket connection established.
- If the Sockets extension is not enabled, enable the extension (extension=php_sockets.dll) on the server from the php.ini file.
- Create server.php file
- Need to create a socket, binding address to the socket, and listen to incoming connections with the below code.

- Then we will write code to accept new connections, remove disconnected clients from the list, and send messages to connected clients.

- The function below will send messages to each connected client.

- PHP developers India are surely aware that now PHP code will check a new connection request if any new connection request then it will accept the request and perform a handshake with the new socket resource. And then send acknowledgment about connectivity.

- Once the handshake is performed successfully, the client can send and receive messages. Data that the client will send will be encrypted, so data needs to be masked and unmasked to send and receive to the client.

We are done with the Chat server implementation, now we have to start the Chat server.
6. Start Chat Server
- Open the command prompt and run the below command line to start the chat server.
php -q D:\Projects\xampp\htdocs\socketchat\server.php |

- Now you can open index.php (http://localhost/socketchat/index.php) from the browser, which will display a Chat window with a message that the socket is connected. And now users can start using Chat functionality.

7. Conclusion
When there is a need for real-time data, WebSocket is the solution in place of HTTP requests. Chat is just an example here, but we can use WebSocket for other requirements also like display tasks, add/update/delete real-time, display tasks, and status updates as soon as that triggered.
Laravel’s event is easy to implement and provides a simple observer practice. Allowing application user to subscribe and listen to various events that occur in...


Comments
Leave a message...